This blog contains affiliate links, which means I may receive a (very) small commission if you click a link and purchase something. While I wish these commissions were enough to send me on monthly shopping trips to Paris, they do allow me to continue to produce content.

Saturday, April 21, 2012

Serger, Part Two

I bought the Huskylock Husqvarna S21 Serger and got it shipped to me, but I couldn't get it to sew.  I spent an entire day going through the manuals and DVD trying to get it to work, but NOTHING.  I read the reviews and had assumed that the people who complained about not being able to get it to sew just hadn't read the instructions.  I DID, so this MUST be a bum machine. 
Viking Huskylock S21


As an act of desperation after not being able to get it to sew anything, I stopped in the Viking store to sign up for classes. Maybe at least they would be able to tell me if I need to send the machine in for repairs.  (the store is inside JoAnn's) The employee told me that they aren't offering any classes because the manager just quit and they won't have any scheduled for months.

Of course.

However, she said if I wanted to come in with my machine, the she would give me a private lesson until my machine worked.  For free.  I fell in love with her just a little right then and there. 

And so, I found out that Friday during the day was her least busy time and I took the day off of work (I am well aware of how cool that doesn't make me sound and feel my 16 year old self hanging her head in shame), showed up with my serger about 30 minutes after the store opened and stayed for two hours.

The Viking employee was FANTASTIC.  It turned out that I was threading it incorrectly for one of the four threads.  Only slightly incorrectly, but it was enough to make it not function at all.  We talked about tension, cover stitching, blind hemming... everything the machine does.  I ended up buying a blind hem foot and a book I didn't really want from them because I was so grateful.  Thank you Viking!

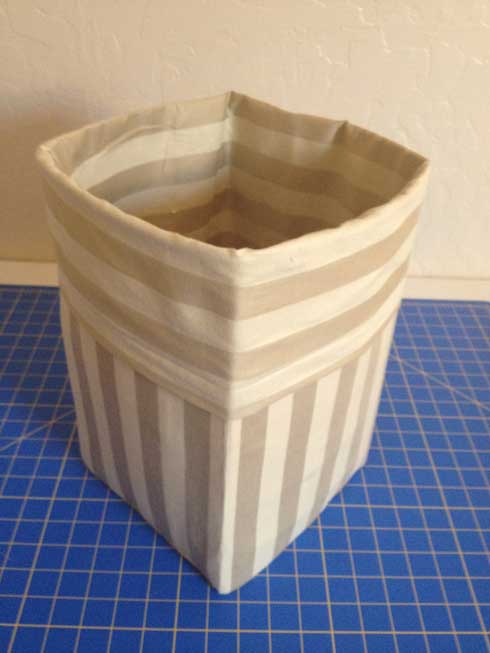
Here is a bit of my handiwork on the lining of a dress I am working on.  It cut the edge and also stitched it at the same time.  Which is exactly what it should do, but I still find it amazing and very cool.  It is a complicated little piece of engineering.

Overlock stitch on cotton lining of a yellow retro dress.


The only complaint I have about this machine is the DVD and manual.  I really couldn't get it to stitch after diligently reading the instructions and watching the demo provided with the machine.  I didn't have any serger experience, but at some point, the instructions have to be to blame.

If you have experience with a serger, this will probably thread for you just fine. 

Overall, I think I am going to be very happy with the purchase and would recommend this machine.

Monday, April 16, 2012

Strapless Black and White Dress V8766

This dress is from view C of Vogue 8766.  I chose a silky synthetic fabric for the fashion fabric and lined it in a white apparel lining.

This picture is actually the second attempt at the dress.  For the first attempt, I used lining, fashion fabric and boning as the pattern directed, but it just wasn't thick enough fabric to make this look work.  It was droopy and looked strange.  (I wish I had photos, but I didn't take any)


I left the dress hanging in the guest bedroom closet, unhemmed and semi-finished and was disappointed that I would never wear it and didn't know how to fix it.  Then, I took an online sewing course that dealt with bodice construction (the Bombshell Dress) and I learned a few techniques that very much helped for this dress.

One of the things I picked up from the Bombshell dress course was to  make a more constructed garment and how to reinforce the fashion fabric with another layer of fabric.  For the bombshell dress, it was a layer of muslin sewn to the fashion fabric.

I took apart the dress, which I knew was the best thing if I ever wanted to wear it, but it was still a little painful...  I sewed a layer of muslin to the fashion fabric and used them as if they were one layer.  It made all the difference! VoilĂ !  No more droop. 


Still, the only thing I don't like about the dress... it isn't fitted in the bodice.  Although there is boning in it and it has a layer of muslin and lining, so it holds up vertically, it doesn't really hug the curves.   It makes the girls look pretty flat from the side. I would have liked the front more rounded and fitted around them (I mean, if you are going to bother to take them out to a party, you should cradle them)


I would make the dress again, but pay more attention to the princess seams on the front.  Either the pattern needs adjusting or I may not have sewn them correctly. Or the boning needs to be adjusted so it doesn't flatten the front out.  Or, I just need to make a smaller size... or just make small bust (sigh) adjustments.

The inside of the dress.  It was really tough to get the zipper in straight with the slippery material.  I had to sew it in then take it out several times.

Overall, I like the dress and would make the pattern again.  I may make one of the other views with sleeves next time.  I like the look of the lace on the view F.  I would like to try that.  Plus, the strapless version ends up looking so dressy that it looks strange if you just wear it out for fun.  This is not a "I'm heading out for coffee on a Sunday morning" dress, but view F of the pattern could be with a different fabric choice.


Serger, Part One

I have been shopping and comparing sergers for months and finally decided to get the Viking Huskylock Husqvarna S21 Serger.  The reviews on this serger are fantastic.  It isn't the most expensive serger on the market by a long shot, but it was definitely a splurge for me. After doing a lot of comparison shopping, I found a seller on eBay with the best price around for a new machine, even considering shipping charges.
My New Paper Weight

It finally arrived on Friday.   I was so excited!  I spent all day Saturday and Sunday morning trying to use it.  I am sad to report that I haven't been able to get it to sew anything at all.  I read the reviews for all sergers and I was well aware that people couldn't get them threaded or working properly, but I just assumed it wouldn't happen to me.  I would read instructions.  I would watch and follow the DVD tutorials.  I am smart.

After spending hours threading and rethreading it, reading the instruction manual, watching the DVD tutorials  over and over and feeling less and less smart, it won't sew.  It sews for about an inch, then gets all tangled.  Something is definitely wrong.

Before I throw this thing out the window (which sounds really satisfying right now), I am going to stop in the Viking store at JoAnn's today and see if they have a class sometime soon. At least that way I can find out if this is a bum machine or I am just doing something incorrectly.  Right now it is a heck of an expensive paper weight, but not much else.

Stay tuned.

Sunday, April 8, 2012

Bombshell Dress, Part 2

I have finished the online sewing course at Craftsy - Sew Retro - Sewing the Perfect Bombshell Dress. I started blogging part one here. This is part two - all finished!

I couldn't be happier.  I learned so much making this dress.
Inside as nice as outside.  Plus detachable strap.
A clean job on the zipper.
Even if you don't want to sew retro dresses, the online course Bombshell Dress Class is fantastic for learning sewing techniques and how to follow patterns.  The instructor, Gretchen Hirsch is fantastic.  If I lived anywhere near her, I would take in-person classes.  I have begun following her blog and  and am following her on Twitter.  Then, when I liked her on Facebook, I began to feel a little stalker-ish.   UPDATE: I have also pre-ordered her book on Amazon.  It comes out is September!

I am signed up for Gretchen's next course on Craftsy- the Starlet Suit Jacket.  I'll definitely be posting about it.

UPDATE:
I made a petticoat (and posted a tutorial for it).  Here are photos of the dress with a petticoat.
Without Petticoat
With Petticoat

Sunday, April 1, 2012

Garbage Can

I made a new garbage can for the sewing room.  I had some leftover heavyweight Pellon from the iPad cover project - I way over-purchased- and some fabric from the remnant pile.
Here is the finished trash can.
 

Cut from fabric:
8 rectangles 19 inches x 9 inches each
2 squares 9 X 9 inches
Cut from heavyweight Pellon
4 rectangles 8 X 13
Use 1/2 inch seam allowance for sewing fabric

1. Iron the Pellon on the wrong sides of 4 of the fabric rectangles, so that it is about 1/2 inch from three of the sides. 
2. Sew the long sides of 4 of the rectangles together so that you have 3 seams and 4 panels (with the Pellon ironed in).  Sew as close to the Pellon as possible.
3. With right sides together, sew forth edge together.  The Pellon will be on the outside and the right side of the fabric will be on the inside.
4. Sew on the square to the bottom of the rectangle.  This is the inside of the can.
5. Repeat making the rectangle with the other set of fabric pieces.  Turn right side out.  This is the outside of the can.  Insert inside of can (completed in previous step) into outside of can, so that only the right sides of fabric are showing.
5. Fold over one inch of fabric twice and hem.  It now looks like a paper sack.  You can fold over the entire top of the trash can - there should be approximately 5 inches that fold over. (see picture)
Related Posts Plugin for WordPress, Blogger...